Can You Upload Custom Decals in Need for Speed

Need for Speed™ Estrus
This item has been removed from the community because it violates Steam Community & Content Guidelines. Information technology is only visible to you. If y'all believe your particular has been removed by mistake, please contact Steam Support.
This item is incompatible with Need for Speed™ Heat . Delight see the instructions page for reasons why this particular might not work inside Need for Speed™ Heat .
Current visibility: Subconscious
This item will only be visible to you, admins, and anyone marked as a creator.
Electric current visibility: Friends-only
This detail volition but be visible in searches to you, your friends, and admins.

136 ratings

How to import your ain images as decals into Need for Speed™ Oestrus
Past using the latest version Frosty Editor, importing decals is possible to some extent, this guide will cover everything you need to know about 'em, from the basics upwardly to how you lot can circumvent common issues. The guide will likewise cover how to bump the livery resolution from 2048x2048 to 4096x4096 or fifty-fifty 8192x8192!
Downsides
Before diving head-on into this, let us take a look at a few plow-offs that come up with being able to add any image into the game.
- For mods to work, you'll need to launch the game from the editor every time you want to play.
- Unlike previous NFS games, some decals tin't be replaced, probably due to the current country of the editor, these decals will exist invisible if you replace them.
- There is no proof of people getting in-game bans for modding the game, but, at present that Ghost Games was dissolved, it is most likely that its titles' online components aren't existence moderated anymore, but that doesn't mean you can't get banned if someone reports you directly to EA via their support if the content in your car is deemed as offensive and/or inappropriate (i.due east. sexual content, racism, etc.), resulting in your Origin account being suspended or even banned. This isn't much of a downside as you lot have no risk of being banned as long equally you aren't an absolute unfunny bigot.
Despite all that, one BIG selling signal of modding your decals into the game is that other people will meet them online.
Downloading Frosty Editor and Intel's DDS Plugin
The post-obit link will download the latest version of Frosty as of the engagement of this edit. I recommend joining the Frosty Editor Discord server[discord.gg] if you wish to ever accept the latest version in hands.
{LINK REMOVED}https://www.mediafire.com/file/tpoycqy142tam52/FrostyToolSuite05092021.zip/file
Download it and extract the folder inside the RAR archive somewhere you can easily admission later (ex: Your "Documents" folder.)
Afterwards everything is fix up, just run the editor, create a new profile, navigate to the install location of your re-create of the game, select the file "NeedForSpeedHeat" executable file and expect for it to load all the game's files.
After that footstep is dealt with, close Frosty and let it rest while we create the decal itself.
For this guide, I'll also be using Intel's DDS Plugin, whatsoever other DDS toolset for Photoshop works but if y'all don't accept 1 already I highly recommend this 1.
https://github.com/GameTechDev/ITW-Beta-Test/releases/download/ITW_1.0.4/IntelTextureWorks_1.0.4.zippo
Open the Null file, get to the Plugins binder inside information technology, choose either the "Win32" or "x64" folder depending on your operational systems' architecture, taking into count the time we live in the chances are that your system is likewise running x64, so drag the "IntelTextureWorks.8bi" file from one of these folders to your Photoshop plugins folder, just like how it is shown in the epitome below.

Now go back to the chief folder of the ZIP and open up the folder "PhotoshopScripts", it'll contain two files which you lot have to drag to the "Adobe Photoshop 2020\Presets\Scripts" directory, as shown in the image below.

More detailed instructions are included in the read-me file bundled with the Zero.
The inner workings of a decal
Decals in NFS 2015, Payback and Heat are composed of 3 images:
Base

Stencil_Character01_2048x2048_T_D
Mask

Stencil_Character01_2048x2048_M
Thumbnail

Stencil_Character01_2048x2048_thumb
- The base prototype's name ends with "_T_D" and information technology holds your RGB paradigm information
- The mask image's name ends with "_M" and information technology holds unused textile information in the ruddy and blue channels while the green channel stores your alpha mask as it has the to the lowest degree compression (more on that later.)
- The thumbnail isn't really part of the decal itself, but information technology is used in the menus, and replacing it will improve visibility when navigating the livery editor.
The key here is to replicate this gear up of images with any image you want.
Setting up your image
At present that we know how the game handles its decals, nosotros tin can finally make our own.
For this guide, I'll be showing how to achieve the result with both Photoshop CC, while my friend wargen shows the aforementioned process done with pigment·net[getpaint.net].
You lot can use any image manipulation software that gives you lot the possibility of editing private RGB and Alpha channels (ex: GIMP).
Before editing anything though, we need an image, the game can handle images upwardly to 4096x4096 (4K for short) pixels wide, 8K is likely to cause performance issues or not even piece of work at all, but anything that is a common power of 2 (512x512, 1024x1024, 2048x1024, 4096x512...) can exist used.
You can utilize also an opaque image, but transparent ones are what I presume people will use the most.
If your image is meant to have a transparent background but it doesn't take a mask/blastoff aqueduct, you'll need to either find a version with transparency or mask it yourself, in case of the latter, in that location are countless Youtube tutorials on the topic.
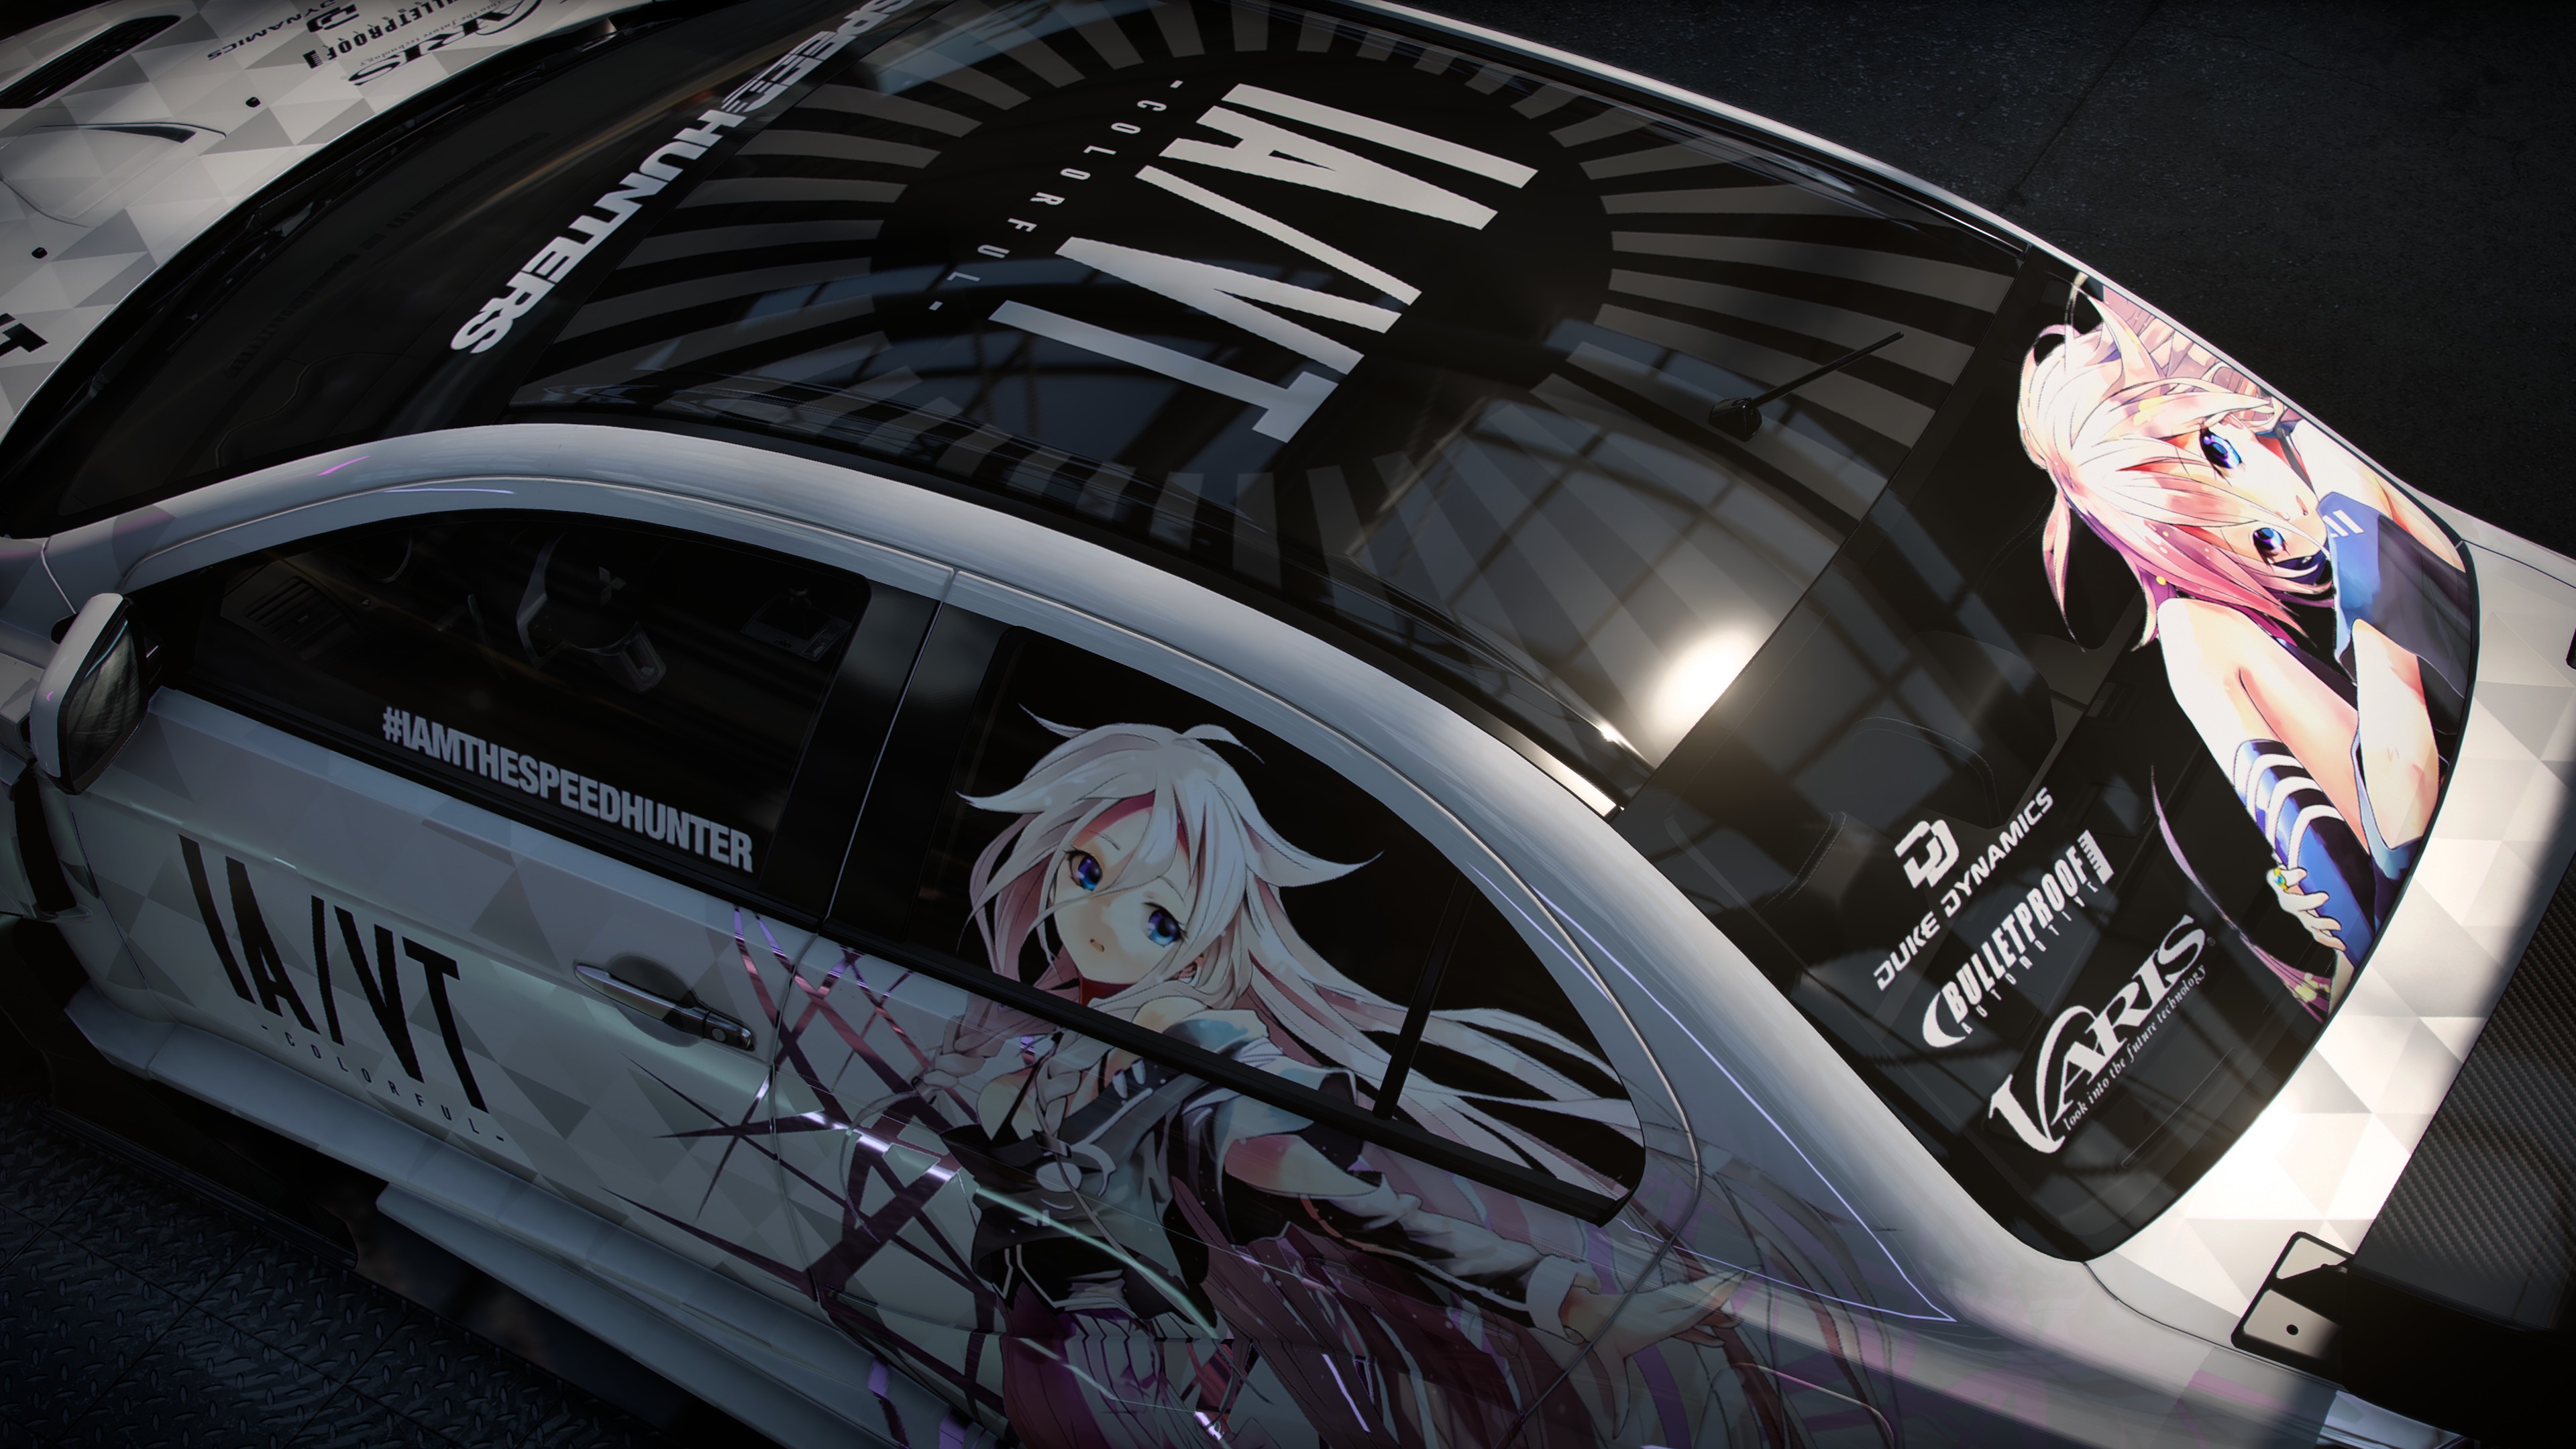
Equally an example, I'll be using this image from IA/VT Coloful.

Photoshopping - Part 1 (Texture Resolution)
The start trouble is that the paradigm isn't a power of two, but that is elementary to resolve if we go on a few things in mind.

In the instance of this prototype, it is improve to rescale its height from 2214 to 2048 pixels with the Bicubic Sharper resampling method, so we lose less detail.
Tip: Make sure to keep the amount of empty infinite betwixt the borders to a minimum, you'll get more resolution to spare that fashion.
Tip 2: If you think you'll be rescaling your image a lot, brand certain to turn your image into a Smart Object every bit shortly as you import it into Photoshop, this mode, the image won't lose its original resolution regardless of how you transform it.
We've scaled our paradigm's superlative to a ability of two, which's halfway the scaling process, but we withal demand to get the width to an acceptable pixel count, in this instance, I take two options, either crop my canvas to 1024x2048 and scale downwardly the image to fit within it or, stretch the canvass from 1334x2048 to 2048x2048 at the toll of having a big texture, I'll be proceeding with the latter as near decals in the game that resolution anyway, simply this should be analyzed on a case-past-case footing, wasting retention resources for no expert reason is a bad practice that should exist avoided.

Photoshopping - Office 2 (Masking)
Now that our resolution is settled, we can motility on to our mask texture.
Get to your layers tab and, while holding the Alt key, click on the layer mask of your paradigm.

Your mask will be shown in the viewport instead of your epitome, which means y'all're currently editing it.

At present, press CTRL+A to select the unabridged canvas and press CTRL+C to copy the mask, now, make a new document based on your clipboard and paste it in at that place.
Tip: I recommended that yous rename the certificate to your decal's name with a "_M" at the end, then there is no confusion when working with the base of operations paradigm and the mask.

Make certain that the document's colour way is prepare to RGB Colour, this is crucial for the next step.
In your new document containing your mask, go to the Channels tab

These are your individual cherry-red, greenish and blue channels, every bit this was mask was originally a grayscale image, all of them should be identical, which is exactly what we desire.
Now, go to the Carmine and Blueish channels and make them Blackness and White respectively, by doing that your image should wait exactly like this

Tip: To easily plough the Red and Blue channels into solid colors, select the entire prototype like nosotros did earlier (if it isn't already), go to the channels you want to erase and printing the Delete key, this will make Photoshop fill the entire channel with your background colour which, by default, is white, and then repeat this for both the Red and Blue channels and capsize the color (CTRL+I) of the Red channel to go far blackness.
Photoshopping - Final Part (Exporting and Thumbnailing)
Now that our textures are done, nosotros tin consign them to DDS files that tin be imported into Frosty.
Exporting the mask
Get to the certificate with your mask and go to "File -> Save Every bit..." and in the format list select "Intel© Texture Works (*.DDS)"
Make a binder in a place where you can shop all your decals and choose a proper name for your decal, doesn't need to be anything complex as it won't affect anything afterwards on and has the sole purpose of better organize our files, and and so add the "_M" suffix to the name. (Ex: My decal's proper noun is IAVT, and then the mask will be named IAVT_M.dds)
The export settings are very important hither as they aren't the same used in 2015 and Payback.
- Texture Type should be ready to "Color"
- Pinch should be fix to "BC1 / 4bpp (sRBG, DX10+)"*
- Mip Maps should be set to "None"**
* - The game'due south vanilla decals too use mipmaps merely, due to the same reason listed earlier, they can't be exported for now, not that this volition cause any major issues as the livery is baked once yous leave the garage.

Clicking on the preview button volition show up how the paradigm will wait like once export, make use of that to make certain everything is correct.
Tip: Creating a preset with these settings will speed up the workflow.
Exporting the base
For the base texture, we need to repeat exactly what we did for the mask, only get back to the document with your base and export it.

Exporting the thumbnail
You lot should still have the layer mask in your base texture certificate if you followed the guide discussion-by-word, if that's the instance, right-click the mask and select "Apply Layer Mask".

Now, equally the proper name implies, a thumbnail is a smaller image representing the decal, and then what we demand to practice now is rescale the whole paradigm to a size that the game can speedily load to show on the UI.
Most, if non all decal thumbnails in the game are 256x256 pixels wide, 256x128 if it is a rectangular one, simply y'all can do 512 pixels if you want a fleck more resolution, though it nigh likely won't be necessary equally it is only used in the UI.

Now that this stride is out of our way, we tin can export the texture, albeit with a dissimilar set of settings than before:
- Texture Type should be set to "Color + Blastoff"
- Pinch should exist set to "BC3 / 8bpp (Linear)"*
- Mip Maps should exist set to "Auto-Generate"**
Make certain your alpha channel is being exported by opening the Preview viewer and clicking on the "A" button located in the lesser-left of the Preview window, if it shows the black and white mask properly, just striking OK to export information technology.

You should now take a set of three textures that looks like this.

Paint·net - Culling Method
*Skip this if you already did all the steps in Photoshop*
For those who don't have access to Photoshop, you can employ http://www.getpaint.net, a free image editing software.
I accept included a youtube video if you are non experienced with this at all and have a hard time understanding.
Getting the image fix
So usually after I take the image set up I crop it so there'southward every bit much space as possible taken up by what I want to be on the decal.
Tip: You can press grid on the top of the screen to run into a grid of pixels and then its easier to crop
And then and then I cease upwardly with this:

Tip ii: You can set up your secondary colour to a transparent color so the canvas will automatically be transparent when you resize it.
What you want to do adjacent is resize either the width or height depending on what's shorter, in this case, the width is 429 so I'one thousand going to resize it to match the superlative which would be 1218.
And then you have a square resolution with a width and acme which is dividable by 2.

Now what I usually exercise is resize the paradigm to 2048x2048 which I don't know if it'due south exactly necessary if the resolution of the image is already dividable by two but I practise it anyway to avoid problems.
Texture
What you want to exercise is just make a new layer, put a blackness groundwork on information technology, move the layer below the image and then merge it.

Mask
To brand a mask you can duplicate the layer of your image and select Curves in the Adjustments tab at the meridian, then y'all take to select RGB under Transfer Map. Later on that deselect Crimson and make sure that y'all accept Green and Blue selected, and then y'all want to pull upwards the line and then both ends are at top. Then finally deselect Green and Blue and select Red and make sure the red line is at the bottom
If y'all've done everything correctly and then you should terminate up with settings similar these and a layer like this.

Note: do not employ the normal blueish in the Colors window because it has an RGB value of 0/38/255, y'all have to make sure the value is 0/0/255 which you tin can alter past yourself if you lot press >> More on the Colors window.

Thumbnail
You lot tin can copy your image without the black background into a separate paradigm and scale information technology downwardly to 128x128.

Saving the images
Relieve the images in the DDS format with the settings shown beneath when exporting the base and the mask, for the thumbnail, utilise BC3 with mipmaps.

Frosty Editor - Replacing Textures (Base and Mask)
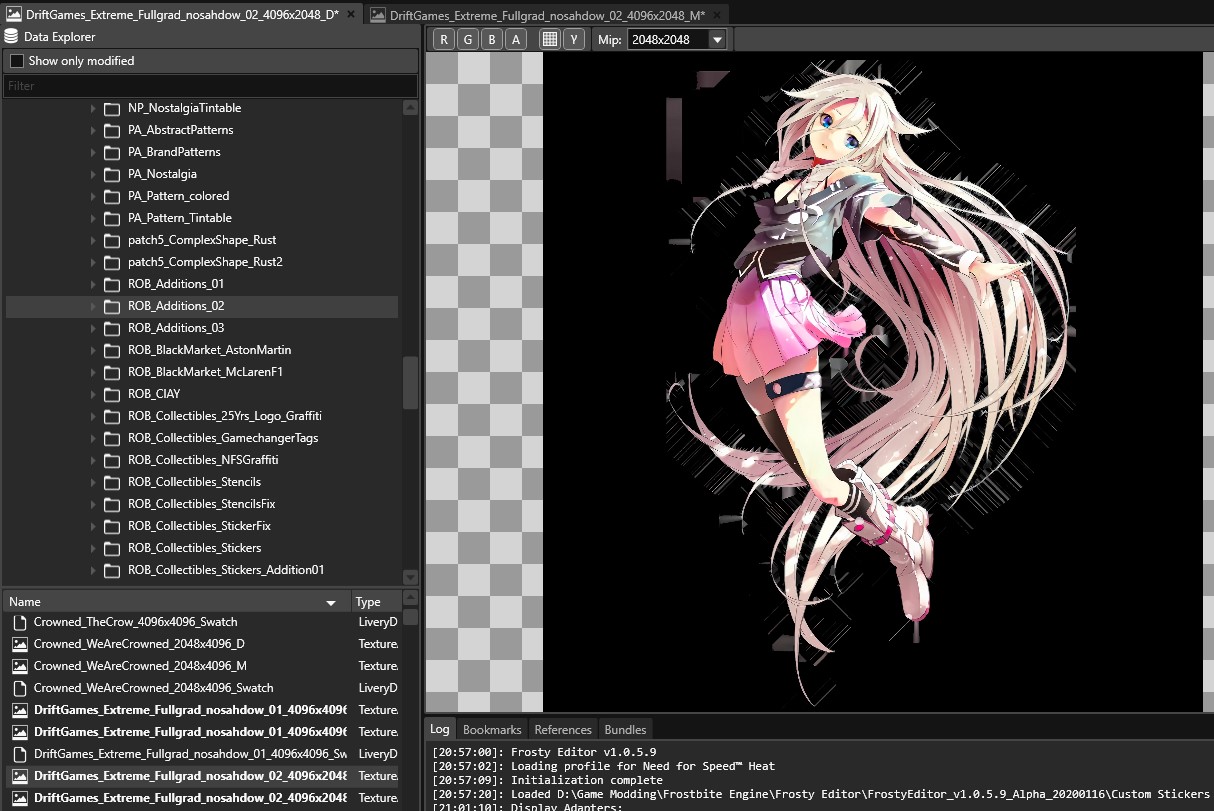
Open Frosty and find the binder "_RecategorizedDecals" in the Data Explorer, it tin be found under the "Vehicle/Customization/Swatches" directory.

Hither you lot'll find a bunch of folders, each with its own category of decals, I recommend going to the "ROB_Additions_02" folder equally it contains decals from the fifth category which most are sure to work if replaced.
For this guide, I'll be replacing i of the Drift Games Extreme decals, especially this one as its size doesn't friction match the texture I'g going to supervene upon it with so I can testify how to fix aspect ratio issues subsequently on.

Yous can notice that in that location are three files referring to the same decal, one with the base, 1 with the mask, and one called "Swatch", this file stores data on what files make upward the decal amid other data used by Frostbite, one of these data entries is called "SwatchHashName", annotation down the number in that entry somewhere as we'll use it after.

Close the Swatch file in the editor and open up the "_D" and "_M" files.
Importing the mask
Go to the file ending with "_M" and click the "Import" push to the height-left of the screen

A window volition pop-up so you lot tin can select the image you desire to import, fix the prototype type to .DDS, navigate to where you lot saved your textures and select your mask.

Your mask is now in the game files!

Importing the base of operations
For the base, repeat the exact same procedure merely with the file that ends with _D".
The next footstep is to salvage your project file by either clicking on the floppy disk icon in the top-left of the screen or by pressing CTRL+Southward on the keyboard, whatsoever progress you made will be gone if forget to do this.
Frosty Editor - Replacing Textures (Thumbnail)
The thumbnail texture isn't stored in the same folder as the base and the mask, instead, information technology'll exist in the folder chosen "Thumbnails" inside the folder of the decal you merely replaced.

The actual file will have the aforementioned name equally the ones nosotros just messed with so it won't be hard to find information technology, it is but the decal rendered in a lower resolution later all.

Replacing the thumbnail
Now that we found the thumbnail, all we need to practice is replace information technology in the aforementioned way we did with the other textures.

Congratulations! If the decal you replaced is in the same aspect ratio as the paradigm you lot imported, you can click on the "Launch" button at the top-left of the screen and test your decal in-game, simply even if information technology works, stick around for a little bit more, I withal got some tricks to teach you.
Frosty Editor - Fixing Attribute Ratios
If your epitome was a square and the original decal was a rectangle (or vice-versa), the decal will be stretched in-game, that happens because the game stores the aspect ratio of the decals in a split file, hence why we saved that proper name hash earlier.
The place where the same file is stored is the "SwatchPacks" binder located in the same directory as the "Swatches" folder nosotros're working on a chapter ago.

At a glance, y'all'll see a bunch of files, just but ane of them contains the decal category of the decal we merely replaced, their names may not brand much sense compared to the folders we looked at before but it is not hard to pinpoint which one nosotros need to edit, I recommend that you filter the file list by type equally the file we want will always exist a "LiveryDecalSwatchPackReference"

As you may take noticed, the decal we edited was in the "ROB_Additions_02" folder, but there are no files here that match that proper noun, that'south considering not all the files here lucifer their folder counterparts, but its a matter of looking around, but it is certain that the file yous're looking for will have the same prefix (ex: my decal was in the "ROB_Additions_02" binder, so its SwatchPackReference counterpart must take "ROB_" in the file name.)

You lot'll need to open any files that you recall have the entry you're looking for and find the i with the decal's ID, it may sound like a lot of work, but it is pretty quick to get through these if you have a quick eye.
In this case, my name hash/ID was 4254164738, and I knew it had to be in 1 of the ROB_ files, and so I rushed through the entries, and eventually, I found what I was looking for.

The aspect ratio of this 1 is set to "2", which ways the decal is a horizontal/vertical texture.
- If y'all want to change it to a square texture, set it to "ane"
- If the decal was a foursquare and yous want it to be a rectangle, set it to "two"
- If the decal is 2048x512, you should use four.
The logic here is that the number here defines the ratio of the width, so 1 is 1:ane, 2 is ii:1, 4 is 4:1, etc...
Should exist obvious by now that the game doesn't piece of work with vertical decals, so make 'em horizontal if you demand to.
Frosty Editor - Tintable and Flippable Decals
Flippable Decals
Picking up from where nosotros left off, you tin likewise give decals the selection to be flipped, this role is quite simple.

Only tick the "ScalingEnable" box and the game will permit y'all flip the decal as you please.
Tintable Decals
You lot can also tick the "TintEnable" box to brand your decal paintable, but if that'southward the case, you'll need to make the decal with that in mind as its base of operations needs to exist fully white otherwise the game volition have problems tinting it, this works best for single-colored logos and cutouts.
Note: For tintable decals, sometimes you lot'll also need to cheque the "TintEnable" box in the "LiveryDecalSwatch" file located in the aforementioned binder as the base and mask textures, sometimes it works by just enabling the one in the "LiveryDecalSwatchPack" file, but that seems to be rather inconsistent.
Frosty Editor - Bumping Livery Resolution (4K/8K)
Keep in mind that other people probably won't be able to see your livery if you lot upscale the resolution.
When y'all leave the garage and go to free roam, the game bakes your wrap into a 2048x2048 (2K) pixels wide image:
It may look fine from distant, but you probably want to make the nigh out of the difficult work y'all spent making your livery, fortunately, there is a style to bump the resolution of this texture to 4K and college by using Frosty Editor.
The only caveat being that this is can only be changed on a per-car footing, and then I recommend that y'all do this only for the cars you're planning on working with.
Open your project once more and go to the "Vehicles/Actor" folder, at that place you'll find a bunch of folders named after the cars available in the game.

But navigate to the binder containing the machine of your pick, for this instance, I'll use the Mitsubishi Lancer Evo X.
Inside the binder, you'll demand to locate the "RaceVehicleBlueprint" file of the motorcar, it should be i of the showtime files you'll run across.

Afterward opening this file in the editor, yous'll but need to type in "Livery" in the filter box and expand the droplists until you lot achieve the "LiverySettings" department.

Hither yous'll come across 2 parameters set to the same value of 2048, "BakedTextureWidth" and "BakedTextureHeight", now you choose betwixt a few things:
After that is done, save and kick the game, the livery of the chosen car will now exist rendered in 4K or higher!
- Fix both of these values to "4096", making the game bake the livery of this automobile in 4K
- Set both of these values to "8192", making the game bake the livery of this car in 8K (Major drop in functioning depending on your GPU.)
You lot can as well attempt a value of "16384", merely it is unknown if the game can actually handle a resolution similar this without crashing.
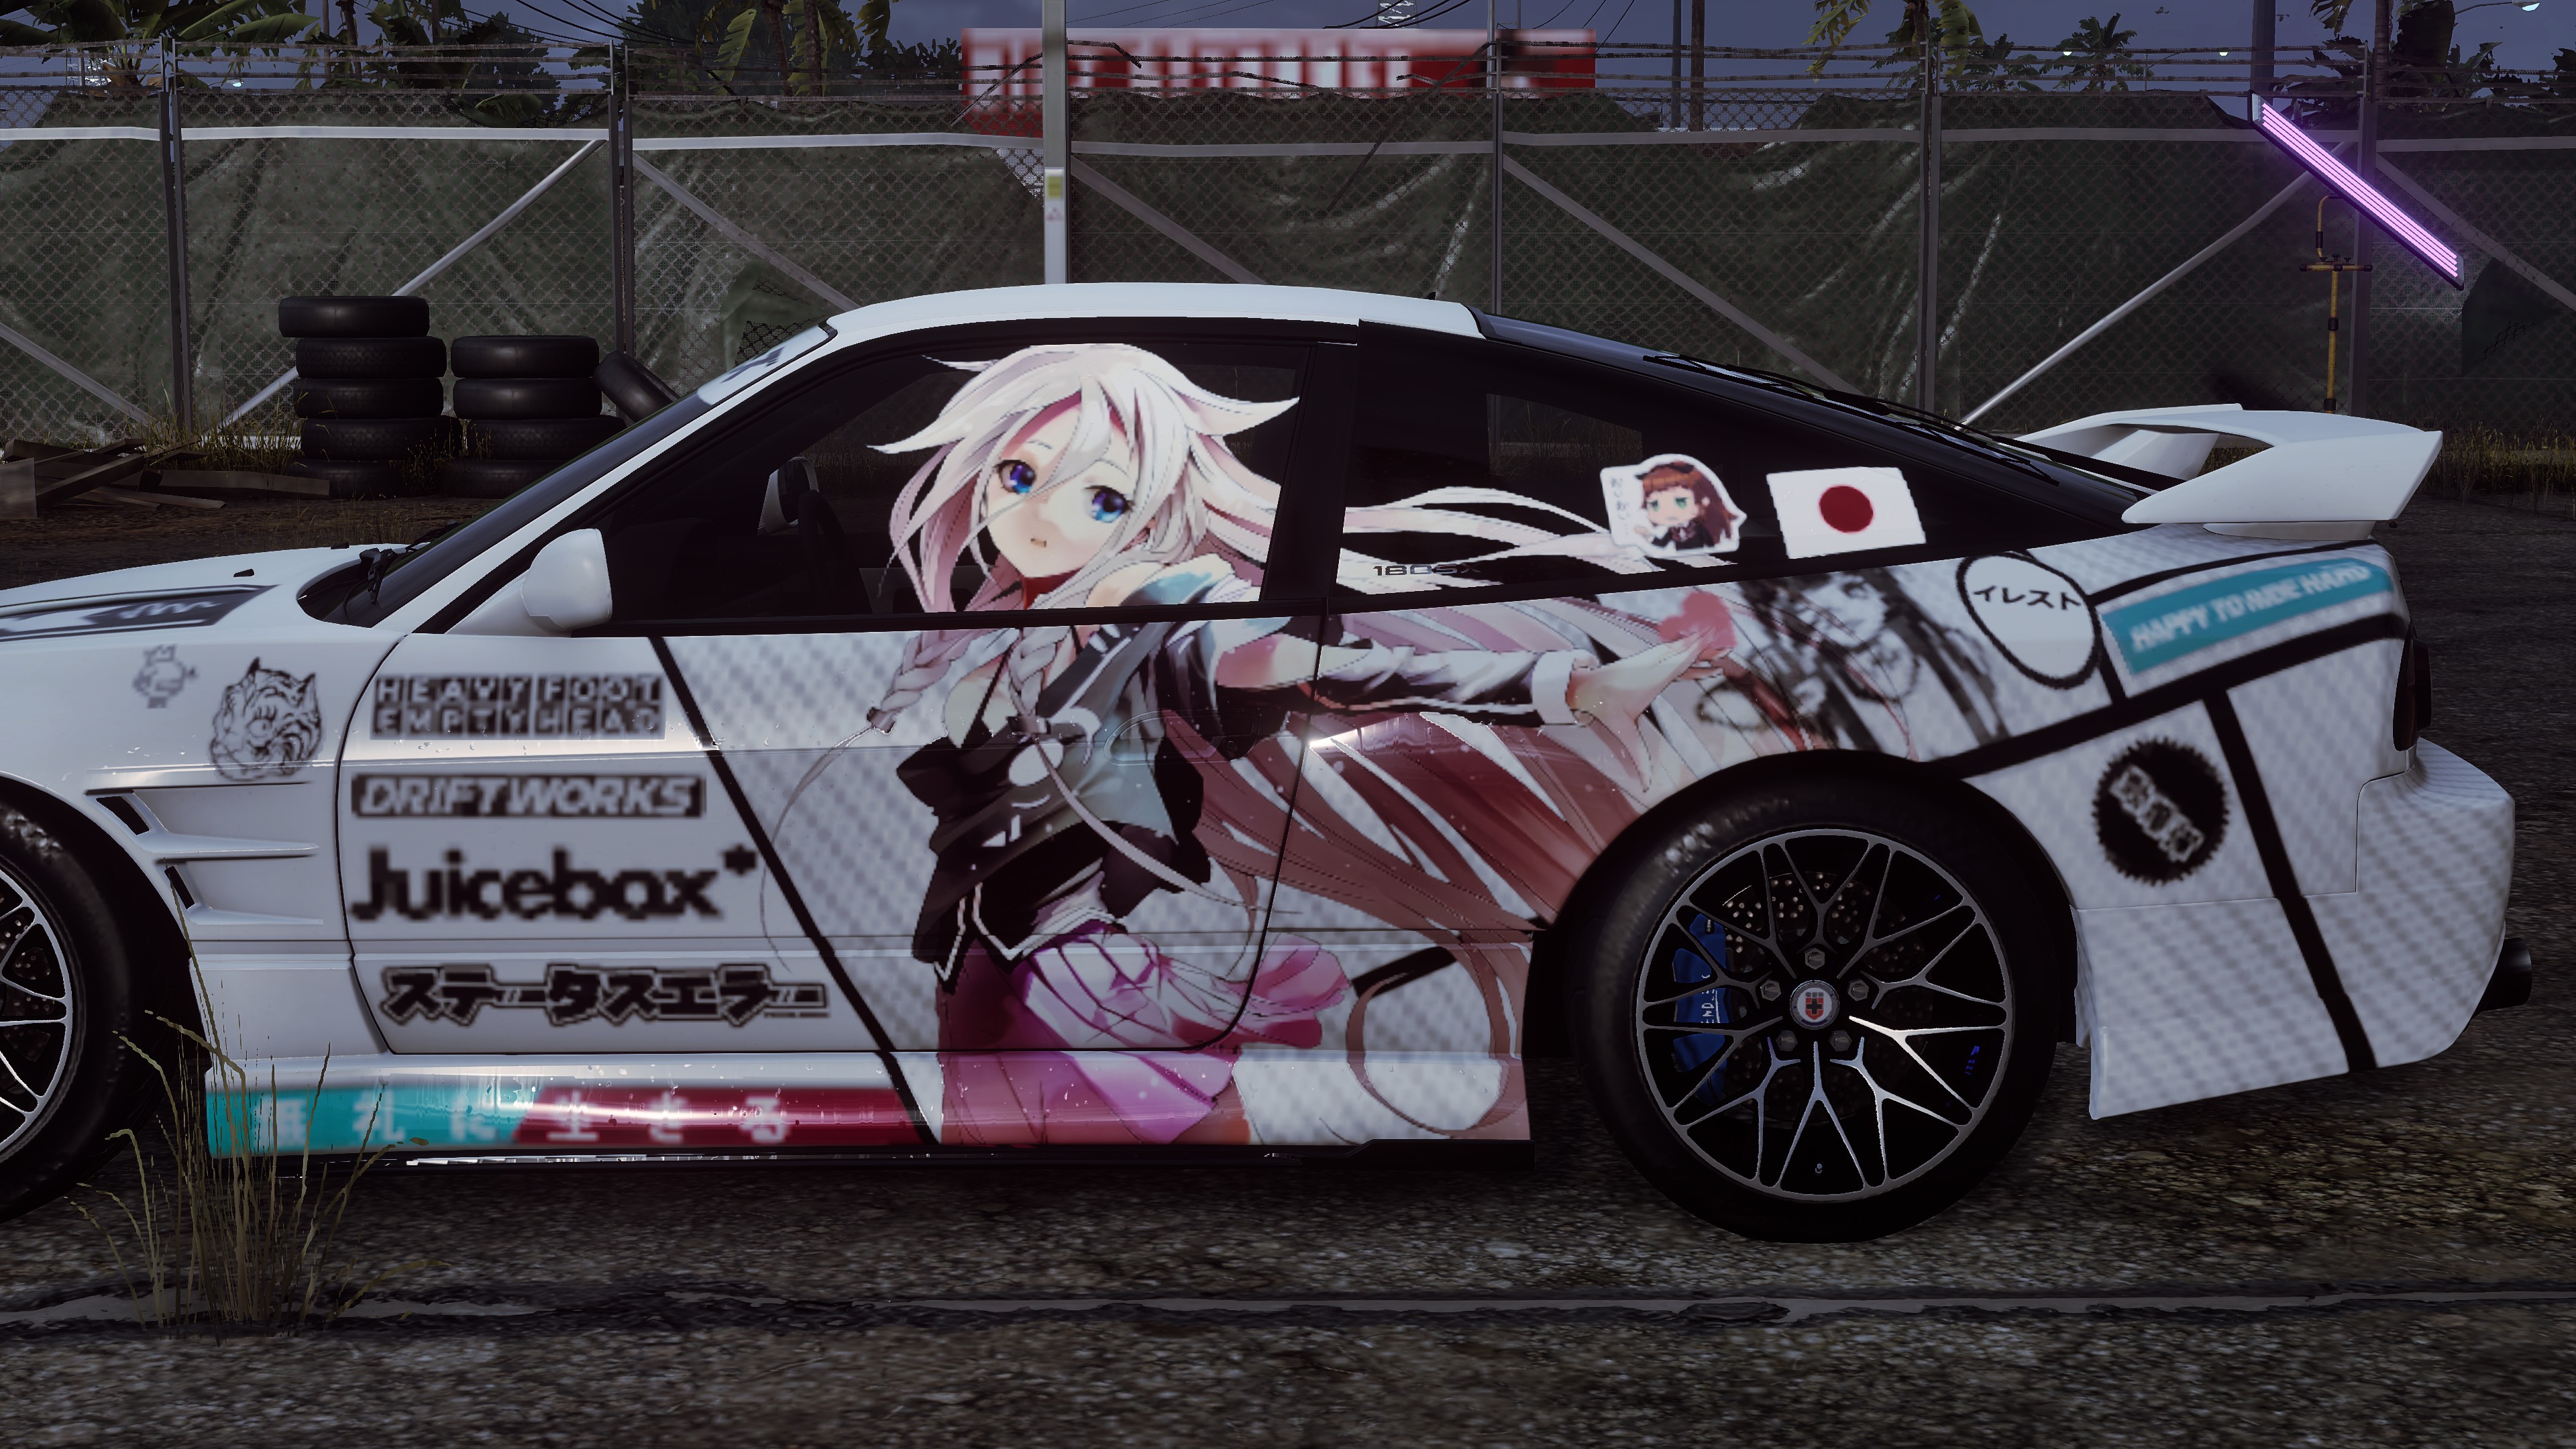
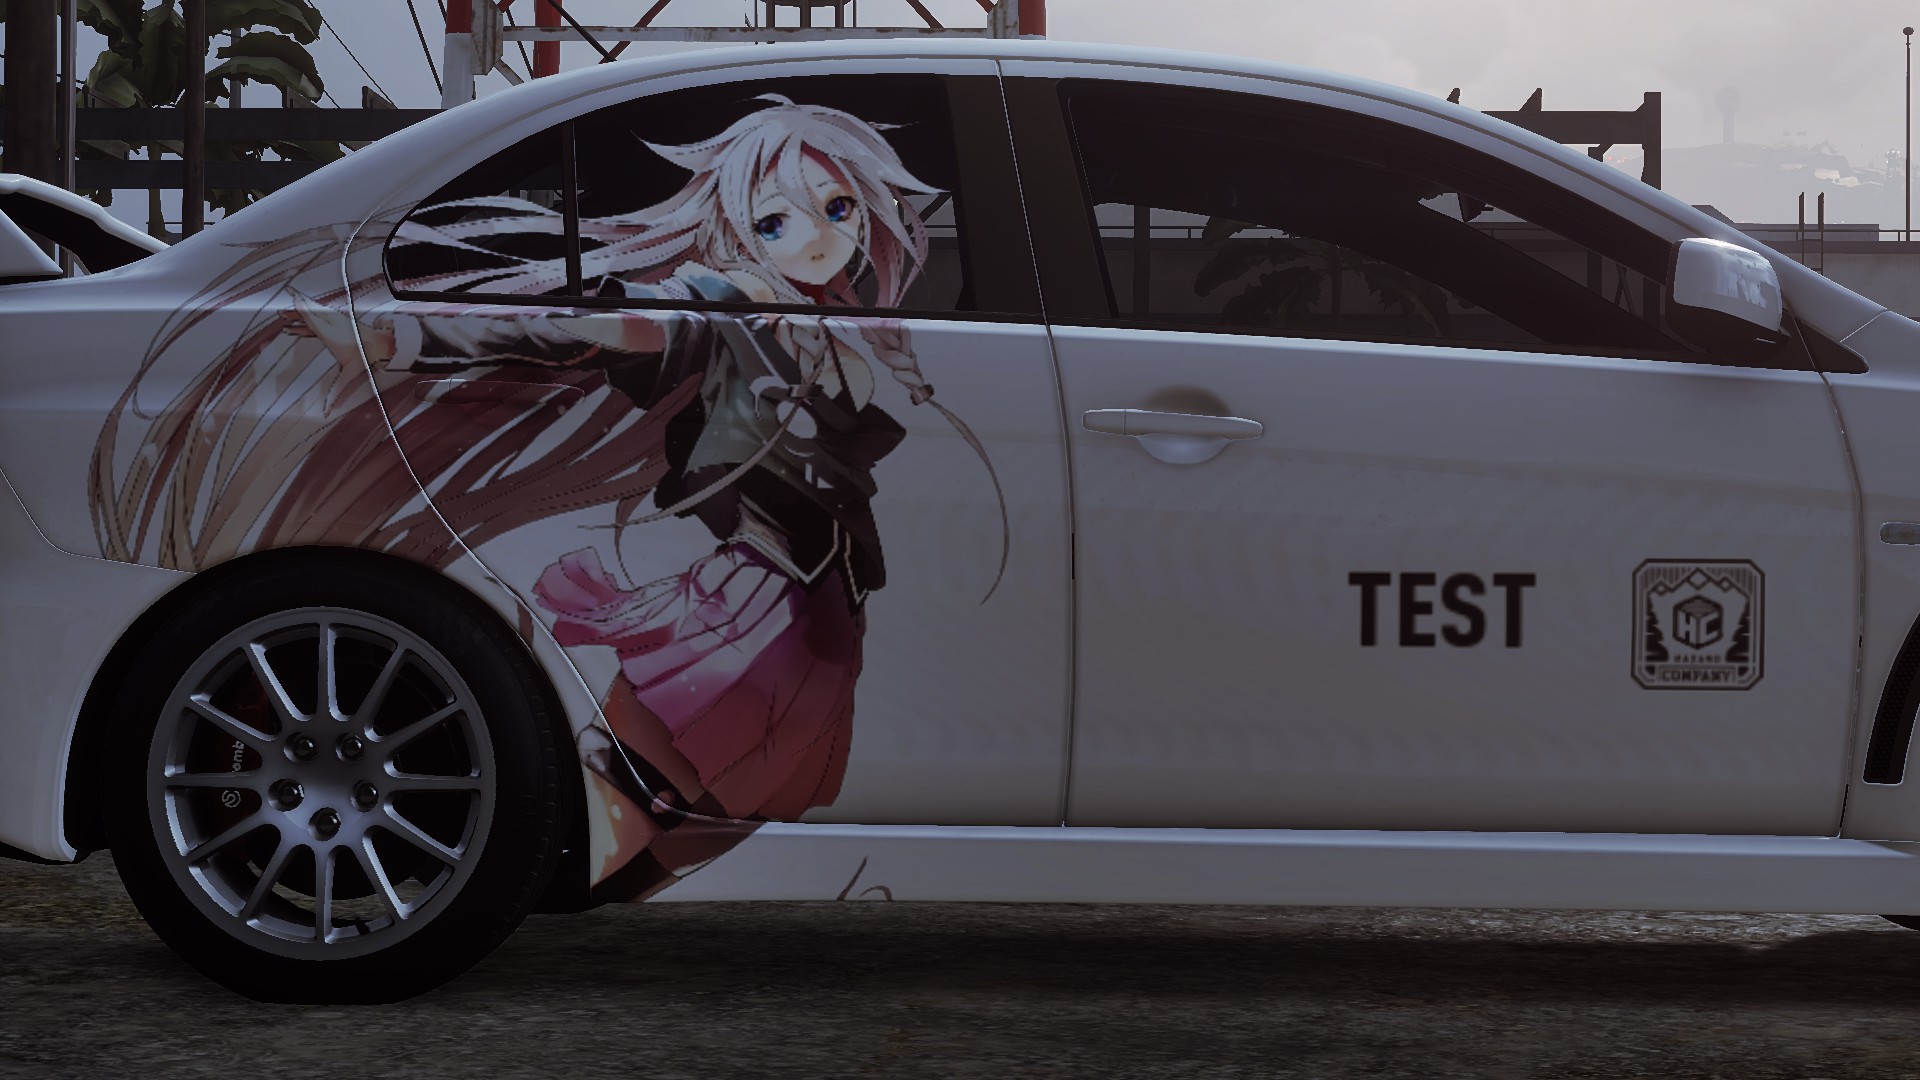
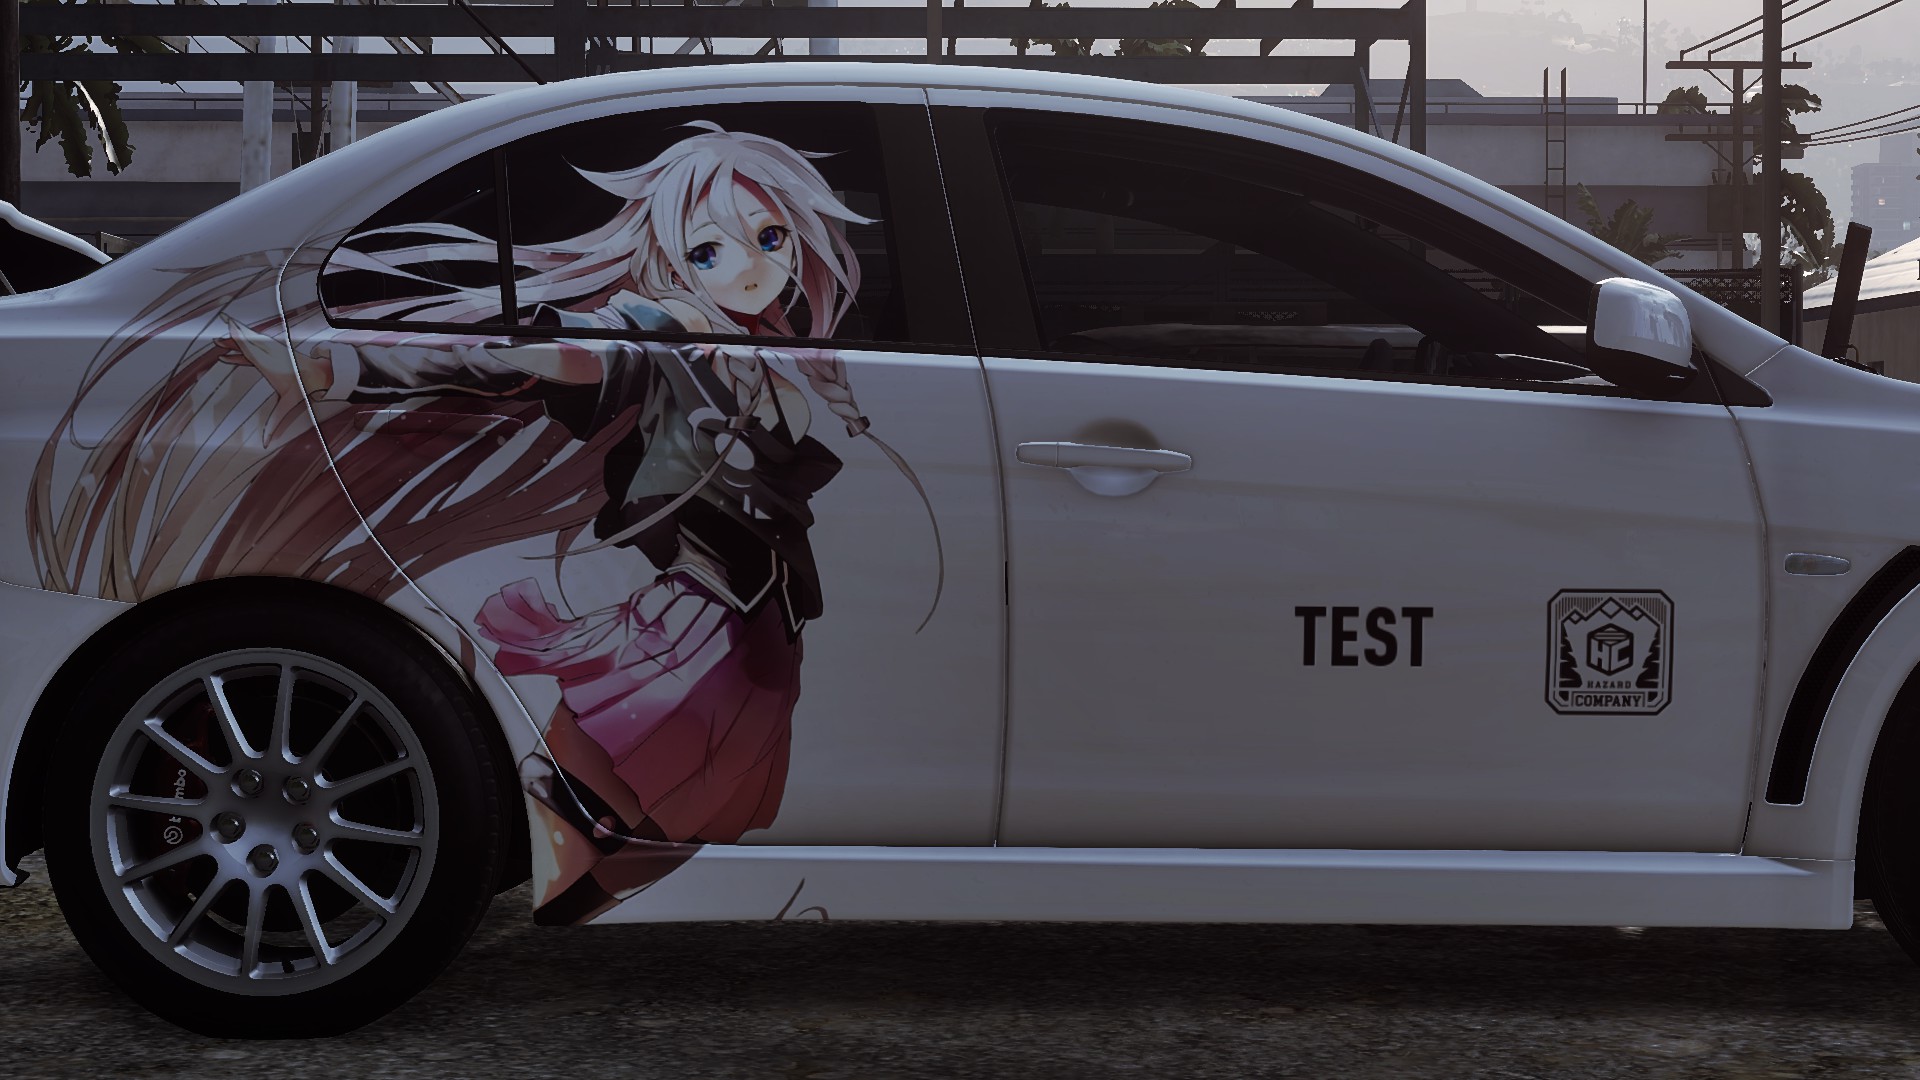
Hither is a comparison between 2K and 4K:
2K
4K
Notation: This volition only affect your car, liveries in AI and other players will still be in 2K.
Determination
This should exist everything you demand to know about custom decals in Demand for Speed™ Rut, if annihilation new is discovered, I'll be updating the guide.
A lot of the methods discussed here tin be also be applied in Need for Speed™ and Need for Speed™ Payback, though some things may differ, guides for these games will exist fabricated in the futurity if need is high.
If you lot need help with anything, don't be afraid to leave a comment asking for help, and If you found anything in the guide helpful, experience free to like and favorite it, awards are also appreciated.
Showcase
Answer to the comments with screenshots of your cars containing custom decals and information technology may exist featured in this department!

Source: https://steamcommunity.com/sharedfiles/filedetails/?id=2401509755
Post a Comment for "Can You Upload Custom Decals in Need for Speed"